Saturday, April 18, 2015

Swinging Beds - Nap on the Porch

I have not been thinking about getting a swinging bed.  But today one of my friends on Facebook shared a blog post she did a while back about porch swings, swinging beds and swinging chairs.  One room or porch was prettier than another.  With summer approaching I am thinking it would be so fun to take a nap on a porch or deck in one of these.


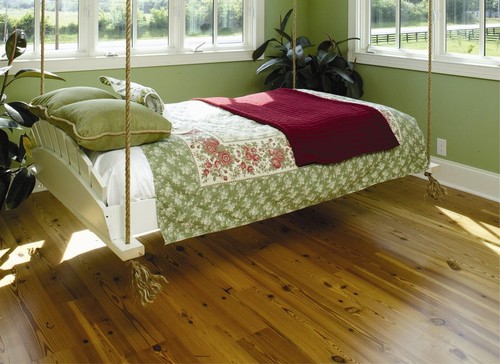
Swinging Bed in the Bedroom

My favorite is the green one below.  This one is actually in a bedroom.  You can see a better picture of it at Dishfunctional Design's Blog Post.


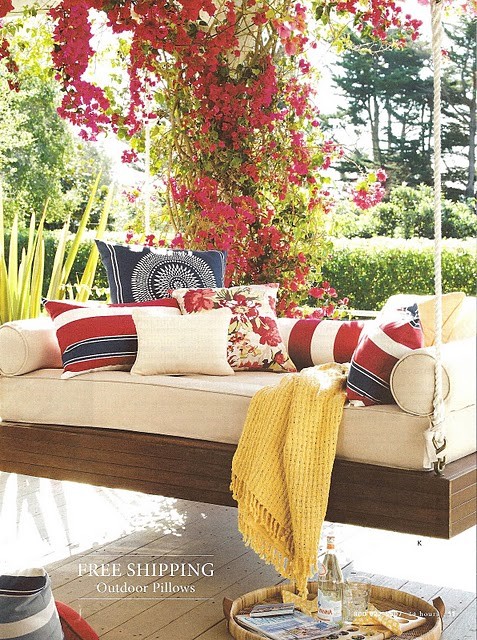
Day Bed Swing on a Porch

Here is a day bed swing.  Doesn't it look cool and comfy?  Can you imagine laying there with the flowering vines above?  Pure bliss!

Full Size Swinging Bed on a Screened in Porch

How about a full size bed on a screened in porch?


Full Sized Swinging Bed in Bedroom

I think the mural on the wall behind this swinging bed is amazing.


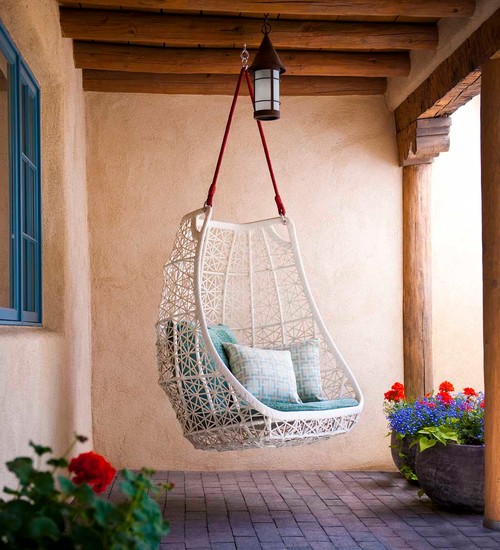
Comfy Swinging Chair

If you don't have room for a day bed or regular bed, how about a cozy swinging chair?  Bring a good book when you sit here.


All of the photos in I posted here are from Houzz.  I discovered this website today, and can see I will spend lots more time there.  It has all kinds of decorating ideas, and you can set up idea books with photos of the things you love.  That sure beats the way I did this years ago.  I would cut pictures out of magazines and tape them into notebooks.  I must admit I still have some of those. :)
P.S. Speaking of naps on the porch, I also subscribe to a delightful blog called Between Naps on the Porch.  She has a good post on what it costs to add an enclosed porch to the house.  You probably will want to read many of her posts.  They are excellent.
Do you have any fun relaxing furniture on your porch or deck.  Let us know about them in the comments here.


Saturday, March 14, 2015

How Long Should a Fashion Lanyard Be?

Too Short or Too Long?

Many of my customers ask me about the length of a handmade beaded or chain lanyard that I make.  A fashion lanyard is an attractive accessory for the clothing you wear at work.  It should also be comfortable and useful for its function.
An id badge lanyard must perform a task other than adorning our outfits.  That is what makes selection of just the right length so tricky.  There is no perfect length in terms of inches that works for everyone.  So how do we decide the length for ourselves?

Where on the body should a fashion lanyard end?

For most people the end of the actual  lanyard not including the id badge or keys attached to it should fall just below the breast. Then the actual id badge or key will lay immediately below the breast above the upper abdomen.
If a fashion lanyard is too short, and falls at the breast or above, then the id badge and keys will stick out from the breast emphasizing that area of the body.
If the fashion lanyard is too long, then the id badge and keys may lay in the lap when seated.  Another problem with a lanyard that is too long is that it gets caught on a desk or table when you get up, tugging on the strand.  Although it may not break immediately, it does cause the wire to fray over time and finally break.  I have been asked to repair lanyards put under this constant stress.   This can be done, but really involves a total restringing of the lanyard with new wire. Basically it means starting all over to make the lanyard.

The fashion lanyard displayed on the mannequin below is really too long for the mannequin. But Matilda, my mannequin, is quite petite so I don't judge the length I will make a lanyard by her size. Don't I wish I were so tiny!


What are the most popular lengths for fashion lanyards?

I have sold many fashion lanyards in my shop over the last five years.  Most of my orders are for 36" lanyards.  I provide choices to my customers of 32", 34" and 36" lanyards.  These measurements are all the way around the strand of beads or chain plus the drop of the lanyard focal beads and clasp.
To decide which length you need, measure with a tape measure from the middle of the back of your neck to just below the breast in the middle of your body.  Then double that number. For me that length is 17", and I am 5'6" tall.  That means I should wear a 34" lanyard.


Here is a guide based on height for the length of lanyard you should wear:

    Your Height Length of Lanyard
5'2"-5'3" 30"
5'4"-5'5" 32"
5'6"-5'7" 34"
5'8"-5'9" 36"
5'10" -5'11" 38"

You may wish to read more about the 
construction of my lanyards.


I have many fashion lanyards available for you to purchase in my shop.  You can select the length you want from the drop down box, or if you need it longer or shorter, let me know in a note when you make your purchase.  

What is your favorite length of a badge lanyard?

Saturday, February 7, 2015

Valentine Project Printables

Valentine Project Printables

Valentine's Day always brings forth great ideas for children's handmade decorations.  This year I spent some time with Maggie, my five year old granddaughter, making some paper crafts for Valentine projects for Mom, Dad, brother and PaPa.  I found these ideas at The Benson Street.  This is a blog that features craft tutorials, printables, recipes and other fun information.  I found these free printables on her site along with a tutorial for using them.  This was a perfect Valentine project for grandma and granddaughter.


I went to Walmart and purchased some cute washi tape and a package of Valentine's pencils.  I have card stock at home, and used it to print the hearts.
Then I also printed the printables for the chewing gum Valentine gift.  While at Walmart I purchased packages of gum for us to decorate.  Again I used the washi tape and the card stock.

These Valentine projects went quickly and allowed Maggie to practice printing.  We used a red Sharpie marker and a black one to do the handwriting.  Here is Maggie very seriously working on cutting out a printable.

We had lots of fun working on this Valentine project.  Unfortunately grandma gets so involved in interacting with Maggie, that she forgets taking all the photos that would add to this post.
We packaged these little gifts into cute party bags with hearts on them.  Maggie took them home and hid them until Valentine's Day.

Another Valentine Project Using Washi Tape

A few days later I saw this post from Kim Layton at Everything Etsy   about hearts punched from washi tape that decorate the front of notebooks.  I ordered the heart punch that Kim recommended from Amazon, and just received it today.  I am going to take the washi tape I have left from Maggie's projects and use it to create punched out washi tape hearts to decorate the front of sweet little notebooks I found at the Dollar Store.  I will give one of these to Maggie and some other cute Valentine things on Valentine's day. I am also making more for my other two granddaughters.

What projects do you do with the little ones in your life?

Wednesday, January 28, 2015

Rhinestone Badge Reels - Bring on the Bling!

Do You Like Sparkly?

Bling is sparkly,bright, fun and popular.  Rhinestones are pretty. I am on the band wagon with that for fun badge reels. I am making and selling badge reels that feature rhinestone buttons. I do them as magnetic or clip on badge reels.


I purchase rhinestone buttons for these.  My hubby goes down to his work room and removes the shanks from the buttons. Sometimes this is a quick snip snip process, and sometimes I hear the grinder running.  On some of the buttons he cuts off what he can of the shank, and then grinds the back down smooth.   When he is finished he has a smooth back to the button.
Then I take the button and glue it to the top of the badge reel.  For the larger buttons, I glue them directly to the badge reel.  For the smaller buttons I glue them to a decorative pendant base or to a metal ring.  Then I glue those items to the badge reel.

 Black Rhinestone Badge Reel
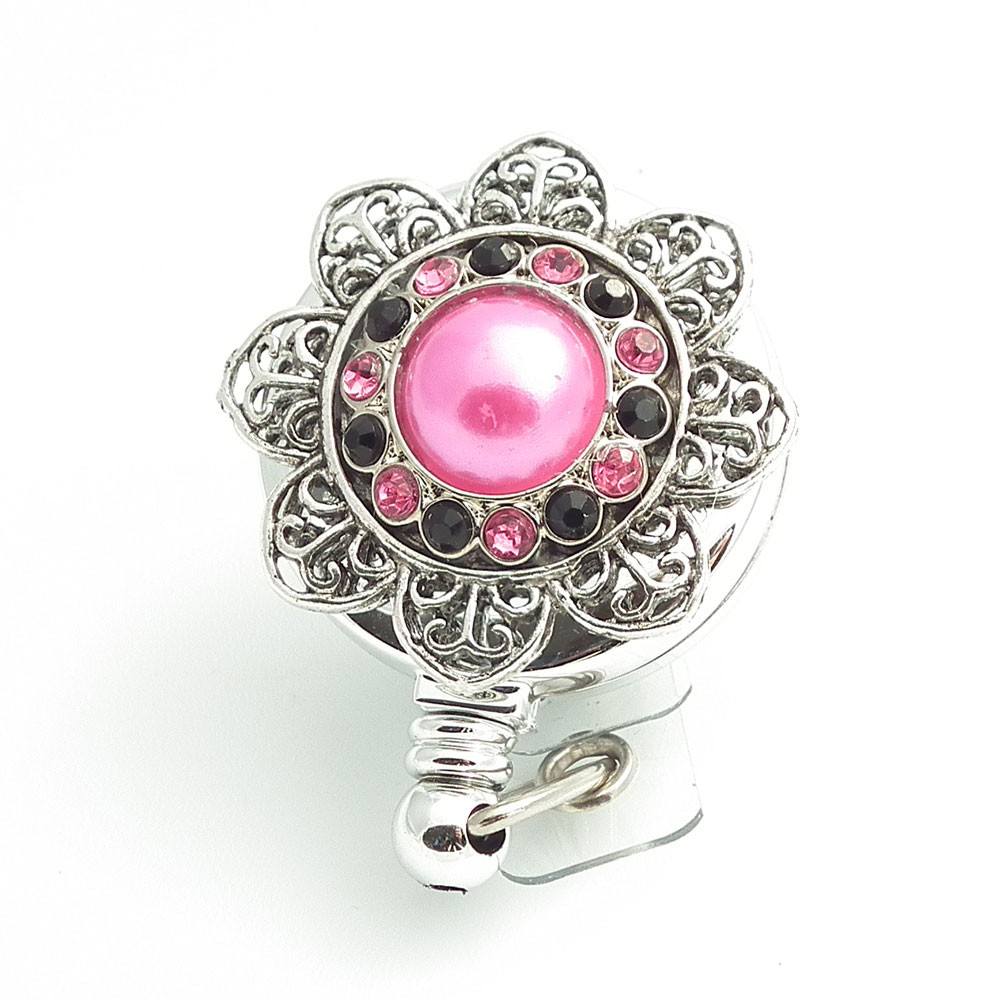
Some of the rhinestone buttons have a glass pearl cabochon in the middle and rhinestones around it.
 Pink Pearl Rhinestone Badge Reel

Grandma wore sparkly rhinestones

I have not personally favored rhinestones in the last thirty years or so because it reminded me of what older women were wearing and what was popular when I was a child.  In addition, I thought rhinestone jewelry was cheap and gaudy. Some of this jewelry was cheap and gaudy, but I was sadly mistaken to believe all rhinestone jewelry was or is unworthy.

 Turquoise Blue Rhinestone Badge Reel


Did you know that rhinestones were from the Rhine River?

I decided to do a little research into the history or rhinestones and found that they originally were small colorful pebbles from along the Rhine River in Europe. Antique Jewelry Investor describes these as " razzle dazzling little pebbles, originally found along the Rhine River."  As I read further, I was delighted to learn that Swarovski in Austria furthered the refinement of rhinestone jewelry with his invention of a glass cutting machine that would cut facets.  Swarovski crystals are the finest crystals, and I have never thought of them as
rhinestones.  Swarovski does market flat back rhinestones as well as faceted crystals.


The rhinestones used on my button badge reels are not Swarovski crystal.  
They are just lots of fun and sparkly. Have a fling and treat yourself to some bling !


Tuesday, January 20, 2015

Shirt Dresses - Are They Back in Style?

I subscribe to Country Living magazine, and in the February issue they have a full page spread on shirt dresses. It looks like these are making a comeback, and are found at numerous stores.
Shirt dresses, also known as shirtwaist dresses, were very popular from the late 1940s into the early 1960s.  My mother wore one most of the time.  It is the famous garb of June Cleaver on Leave it to Beaver, Lucile Ball of I Love Lucy, and Donna Reed of the Donna Reed show.
Donna Reed - The Donna Reed Show


Shirt dresses are quickly identifiable by the tidy shirt appearance of the bodice.  The button down front, usually has a shirt collar, and may be short sleeved or long sleeved.  The waist is fitted,and the skirt is usually gathered or on occasion pleated.  Comfortable cotton was the fabric of choice for most of these mid-century styles. Women would cook, bake, clean, do laundry, and take care of the children dressed in this "uniform" of the times.

June Cleaver - Leave It to Beaver


Modern versions of these dresses are available at most department stores.  On line you can find them at Mod Cloth.  You may wish to wear a shirt dress to work, and a beaded lanyard would look great with one.

Shirt Dresses from Mod Cloth - Lanyards from Plum Beadacious


Are you planning on wearing some shirt dresses this year?  If so, you may wish to try a beaded lanyard with it.


Wednesday, January 14, 2015

Wedding Tie Patches - for the Groom or Father of the Bride

"The Patch that Changed my Life!"

Becky created a wedding day gift that turned out to be the patch that changed her life.  She was struggling to sell her hand sewn items on Etsy, and a friend of hers asked her to hand stitch a special note for her groom onto the back of one of his ties.  She did this, and it was an instant success.  So Becky took this idea and started creating wedding tie patches to sell in her Etsy shop in June 2013.
First patch - wedding love note for the groom


Becky now sells these wedding tie patches at her Etsy shop, Sew Happy Girls. Her patches became very popular, and soon Becky was featured on Huffington Post, various blogs, and now in Southern Weddings magazine.
This success did not just drop into Becky's lap.  She spent many years of work to get to this point.  Her path took her from the corporate world, to interior designer, then photographer, and then sewing wonderful rag dolls, hence the shop name Sew Happy Girls.  You can read more about this journey at Etsy-Preneurship.

Becky's Art

Here are some of my favorite items from Becky's Etsy store.
This is a wedding tie patch for the father of the bride.  I really appreciate the hand stitching of the words and date and the yellow stitching that outlines the heart.

Wedding patch for the father of the bride

Becky also stitches up some very pretty embroidered jewelry.

Embroidered pendant


Etsy Success

Becky is very enthusiastic about selling on Etsy.  She offers many excellent tips in her interview with Jason Malinak on the Etsy-Preneurship website.
I have enormous passion for selling on Etsy and I tell anyone who asks me, “Do it! Start today! You CAN make money as an Etsy seller!  BUT. Growing a successful shop takes time and lots of it.”
Becky is ramping up for the 2015 wedding season.  If you are having a wedding or have a friend who is getting married, check out Becky's shop for a tie patch.  What a perfect gift!


Friday, January 9, 2015

Resolve to be Resolved - Too Many Choices

Resolve is a Loaded Word -

I am not much for New Year's resolutions anymore, but I am one to plan and make goals. Anyhow I have "resolved" to revitalize this blog and to become more consistently active on social media sites. What's not to like about that, right?
So I knew right off the top of my head that these two goals are of importance to me and to growing my business. So now what? Ah, that's where the difficulties spew forth and overwhelm me. It comes down to too many choices.

Thinking It Through

I am a start from the very beginning kind of gal and look at everything in detail. Personality tests always categorize me as analytical. Good strength don't you think? Well for every strength there is usually a corresponding weakness. Mine is that I can analyze things to death, and not make a move to do anything.

Let's look at my first goal - revitalize my website.  Here is where my brain went on this one.

  1. My first resolve was to analyze what blogging platform I really wanted to use.

  • I have an old blog on Blogger.  It's pretty easy and straightforward to use.  I don't know how to fancy it up the way I would like, and not sure if I can do that on Blogger.
  • This blog is on WordPress.org.  Wow, do I ever struggle to create the look I want here.  But WOW - what can be done when you do know what you are doing is fantastic.
  • I looked at other possible platforms, and did a quick trial run of Squarespace.  It is nice, but a whole new learning curve for me.
  • I finally decided to stay here on WordPress.org and to work hard to learn more about using it.
     2. Once I settled that after many hours looking at excellent published blogs, and at Blogger,Wordpress.org and Squarespace, I decided I had spent too long on the first step, and headed to the second step, to improve the look and quality of this site.  So then I tried out multiple different themes, and finally came back to the same one I have been using.  It is the Adorable theme from Pretty Darn Cute, and uses the Genesis framework.

     3. Next I started trying to develop a new header, so headed over to Canva.  I spent many hours there trying out different ideas.  Meanwhile, I had looked at a blog called Mom Gets Real and was drawn to the colorful header, design of the site,and the fact that you can know what to do to find information there.  I used her header as inspiration to design the one I have on my site right now.


Choices, Choices, Choices

This all took most of my time for over two weeks.  Most of the problem for me was making choices from all the possibilities out there.  I love so many choices, but I also love looking at every choice available to me.  You could spend the rest of your life doing that.
Words that would come out of my mouth during this process:
  • I am so confused!
  • I could scream!
  • I don't know why I want to blog anyhow!
  • I could just bang my head on this desk!
At least I just said these things to myself. LOL!
I still need to tackle my second "resolve" to be consistently active on social media sites.  I need to do much better at my decision making on this one.  I do know I should focus on one or two social media sites and actively participate in them.  So which do I choose?  Facebook, Twitter, Google+, Pinterest, Instagram?

Oh no, my head hurts again!

Do you have any helpful hints to deal with too many choices?  Does that plague you as well?  Leave your comments below.


If you liked this article you may also wish to read more on dealing with choices in this post, Constraints, Ignite Your Creativity.

See Other Posts

Related Posts Plugin for WordPress, Blogger...