Choose Your Photo
First you need a digital photograph that you would like to use for this project. For the purposes of this tutorial I will use the picture below. I chose this one that was sent to me by a customer because it is way too big and contains more in it than we would want to include in the photo glass cabochon.We will select the face of the kitty, whose name is Kernel, for this photo glass cabochon.
Edit the Photo
You will need access to a photo editor on your computer. I use PhotoShop Elements, software available from Adobe, but there are free sites available for you to do this work. PicMonkey is easy to use. Canva also works well.
Upload your photo to the photo editor. We are going to crop the photo down to just the part we want to appear under the round glass disc that we will use for the photo glass cabochon. To do this, choose the option to make your photo square. I use a size of about 300 pixels by 300 pixels. That is larger than my finished size, but it is easy for me to see what I am doing. Get the face centered in the middle of the square. Keep in mind that your final product is round, so don't pull the square in so close around the face that you will lose part of your image because it will be cut off by the curve of the glass disc.
Here is the cropped version of the above photo.
In addition to cropping the photo, I did a quick auto enhancement on PhotoShop Elements. It brightened the kitty's face. You will find tools on Canva and PicMonkey to brighten the photo. You will need to play with that to make it the way you want it. One important thing about that is if you brighten a photo, you may also need to increase the contrast as well. The photo can look very flat if you just brighten it.
Once you have you edited the photo, save it as a jpg. on your computer.
Copy the Photo to a Word Document or a Google Docs Document
The next step is for you to transfer this to a Word Document. Open a Word document, go back to the jpg. on your computer, right click on it and then choose Copy. Now go to the blank Word document, right click and then choose Paste. This is a screenshot of a Word document with the kitty jpg. pasted there. As you can see, the kitty is way too big to use for the photo glass cabochon.
*(Don't have Microsoft Word? You can use GoogleDocs to do this for free.)
*(Don't have Microsoft Word? You can use GoogleDocs to do this for free.)
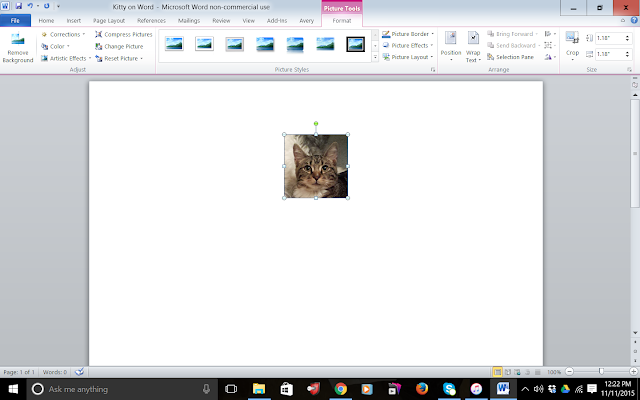
Now, let's work some magic on this photo in Word. Click on the middle of the picture and you should see a tab come up above the toolbar that says "Picture Tools". The Picture Tools will now appear in your toolbar. At the far right of the toolbar you will see an area that says Size. Within that are two small fields showing measurements. Mine defaults to 5". Click on each field and change both of them to 30 mm or 1.18". This is the size of photo glass disc I use for my badge reels. Your photo will suddenly be much smaller.
*(In Google Docs I think you need to crop your image down to the size you need. There is no place to enter the size like there is in Word. In this case, you may prefer to crop your image to the right size in your photo editor, before saving it and copying it into the Google Doc.)
If you are making a smaller photo glass cabochon, then type in the size of your glass disc to reduce the size of your photo.
Test Your Photo
You can now print a practice copy of your photo. Use plain copy paper and a plain photo version on your printer. We will upgrade to best photo when we do the final print. The purpose of this practice copy to to make sure your photo will look good under a photo glass disc.
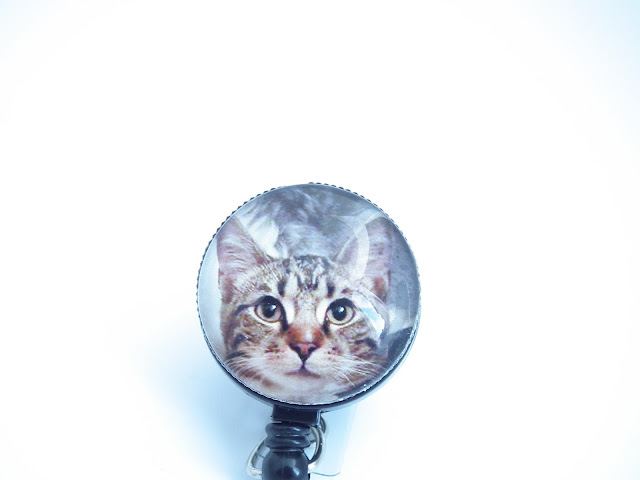
Notice in the photo above that the glass goes all the way across the photo, and the face of the kitty fills the entire round piece of glass. It may take some practice to get your photo sized correctly so that you don't have portions of the photo that you want to show off in one of the corners of your square image. Those will be outside of the round photo glass disc.
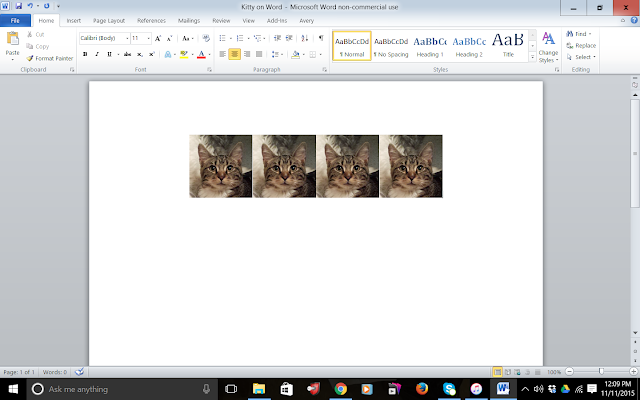
If you are satisfied with the size of your image, you are ready to go back to your Word document to print the image for your photo glass cabochon. I like to copy and paste the image several times onto the document before I print it. To do that, click on the photo, then right click on it and choose Copy. Then right click on your document and choose Paste. Click on Paste however many times you want it to paste into your document. You should then have a row of duplicate images like I have in the screen print below.
Print a High Quality Photo
To print the photo, you should select the highest quality print available to you. I use Epson Ultra Premium Presentation Paper Matte for this final print. Be sure you have plenty of ink in your printer. These use a lot of ink. You may also choose to take the page to a Fedex or other place that can print the photos for you on a laser printer. See my previous post for detailed instruction on printing and making the photo glass cabochon.
Once you follow the steps in the post called How to Make a Photo Badge Reel, you should have a lovely photo glass cabochon. Here is the one I did of Kernel, the kitty.
Please comment and share photos of the unique photo glass cabochons you have made.


No comments:
Post a Comment
Please feel free to leave me a comment or share something new. I would love to hear from you.
LeAllyson