Photo Glass Cabochons
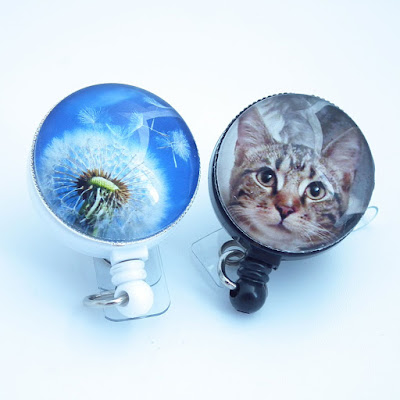 |
| Badge Reels made with photos supplied by my customer |
Many of the id badge reels that I sell in my shop are made with photo glass cabochons. These are very popular. A photo glass cabochon is made by placing a photo or graphic design under a glass disc. These are used by many jewelry artisans to make photo glass pendants and earrings. I use them to decorate the top of id badge holders.
When I first started making badge reels with photo glass cabochons on them, I would purchase photo glass cabochons that were already made. There are many beautiful quality photo glass cabochons available for purchase on Etsy.
Later I decided to create my own photo glass cabochons. Beautiful graphic designs sized at 30 mm, the right size for a round badge reel, are available for purchase on Etsy as well. These come as a downloadable file with jpg. photos ready to print and use for the photo glass cabochons.
I purchased some of these and started my experimenting and learning to make good clear photo glass cabochons This took lots of trial and error. I found a number of online tutorials and used those to make my photo glass cabochons. Very few of those early attempts went into my shop because I was not satisfied with the final product.
Now after many tries, I have become competent to make these. I want to share here how I go about making them in hopes of helping you to arrive at artist quality more quickly than I did. I will share how to use a set of graphics that are already sized for you such at the one in the photo above from Cobra Graphics. Cobra Graphics has some of the finest digital images on the Etsy marketplace.
~~~~~~~~~~~~~~~~~~~~~~~~~~~~~~~~~~~~~~~~~~~~~~~~~~~~~~~~~~~~~~~~~~
Instructions to Make a Photo Glass Cabochon
Supplies that are needed:
- Digital graphics that are 30mm round
- Epson Ultra Presentation Paper -Matte
- Inkjet color printer or Laser color printer
- Micro Glaze - optional
- 30 mm Round domed glass cabochons
- Glass cabochon glue or glaze
- X-Acto knife with #11 blade
- Small scissors
- Cutting mat on which to use x-acto knife - I use one that is designed for cutting fabric.
- Wax paper or some sort of slick paper - I use the 8 1/2" x 11" backing that I pull off of shipping labels.
- Finger nail file or small sanding block
- Small paint brush
- Toothpicks
- 30 mm light weight pendant tray
- Flush cutter
- Badge reel
Printing of graphics:
1. Print the digital graphic page you purchased onto the Epson Ultra Presentation Paper - Matte. Make sure you go to your printer properties when doing this and select "Best Photo" or a comparable setting and also select high quality matte paper. I have an Epson Inkjet printer so I can choose Epson Presentation Paper. You want the highest quality print you can get. Make sure you have plenty ink available.
2. **VERY IMPORTANT** Let the image dry completely.
-If you use an inkjet printer, you can try this trick I learned.
Place the page you printed into your freezer for a few hours. Then
let it dry overnight. This keeps the ink from bleeding once you start using the
glue on it. The other thing you can do is apply a product called Micro
Glaze over the print once it has dried. It protects the print from bleeding.
- If you use a laser printer, allow the image to dry. No
additional steps to protect the image are needed.
Making photo glass cabochon:
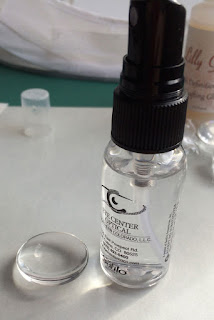
1. Prepare your round domed glass cabochons to be glued to the image. I do this by washing them with a cleaner made to clean my eyeglasses and a very soft cloth. Make sure the glass piece is dry before moving to the next step.
2.
Now apply a drop of the glass cabochon glue to the back of the domed glass
cabochon. If there are any bubbles that appear in the glue gently touch them
with the tip of the glue bottle. You do not want to have any bubbles.
Bubbles cause air to remain under the glass and give a silver effect to the
finished piece, kind of like fish scales.
3. Take a breath!
Carefully place the domed glass cabochon glue side down on top of one of
the 30mm round graphics. Use a very light touch, and place it straight
down onto the photo. You can then move the glass very gently to make sure
the glue gets across the entire piece of glass. Easy does it. Your window
of time to move this is extremely short, just seconds. Then stop!
Once the glue has grabbed hold a bit, gently push down, straight down, on
the glass. Do not move it up and down or side to side. Keep
breathing!
 |
| Glass just laid on photo. You can see circle of glue in the center. |
 |
| Glass pressed gently down on photo |
 |
| Finished photo glass cabochon still on larger piece of paper |
4. Time to admire your handy work.
Isn't it beautiful? The photo above has a glare on it from the sun.
The actual cabochon is fine. Now while you are on a roll, go ahead
and glue the glass dome cabochons to the rest of the photos you want to do.
 |
| Group of photo glass cabochons done at same session |
5. You deserve a break now. Let these cuties dry preferably overnight, but at least for several hours.
Prepping your photo glass cabochon for the badge reel:
1. Place wax paper or paper with a slick backing on top of the cutting mat. Then place the sheet of cabochons on the paper.
 |
| Paper on cutting mat |
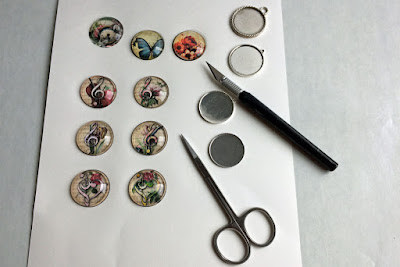 |
| Cabochons, pendant trays and cutting tools |
2. Cut out the photo glass cabochons from the paper. I usually start by cutting around each one with a small scissors. Once it is a more manageable size, I place it onto the waxed paper that is on top of the cutting mat. Then using the X-Acto knife, I cut right up against the glass all the way around the cabochon. The goal is to have no paper showing from the top when you are finished.
 |
| Cut around cabochons to provide smaller piece for working |
 |
| Cut up close to cabochon with scissors |
 |
| Cut around cabochon right along the edge of it |
3. Next take a fingernail file or small sanding block and gently
file the edges moving across the back to the edges. Be careful not to
move from the edge toward the center of the back. That may lift the paper
from the glass edge.
 |
| Back of cabochon- rough - needs sanding |
 |
| Cabochon and sanding block |
4. The cabochon is now ready for a final sealing with the same
glue you used to adhere the glass to the photo. With the small paint
brush and a small amount of the glass glue, coat the back of the cabochon with
a light coating of the glue. Then do the same thing to the inside of the
pendant tray you will use with the cabochon. Let these dry.
 |
| Paint glue on back of cabochon - light coat |
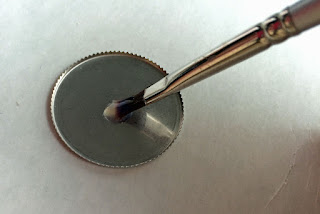 |
| Paint glue on inside of pendant tray - light coat |
4. If there is a loop on the pendant tray, cut it off with a flush cutter, and file it smooth.
5. Using the same glass glue or E6000 glue, glue the glass cabochon into the pendant tray.
 |
| Supplies to complete badge reel |
 |
| Putting E6000 glue on back of pendant tray to glue onto badge reel |
6. Using E6000 glue and a toothpick, glue the pendant tray to the top of the badge reel. Let it all dry overnight. Be sure the badge reel lays flat for this. That can be tricky. I cut holes in a pizza box so I can place the badge reel there with the belt loop, swivel clip or magnetic backing hanging down in the hole. This does a good job of keeping the badge reel flat. The cabochon can slip to one side or another if the badge reel is not flat while it is drying.
 |
| Drying rack made from clean pizza box |
 |
| New finished badge reel drying on pizza box |
 |
| Purse Hanger |
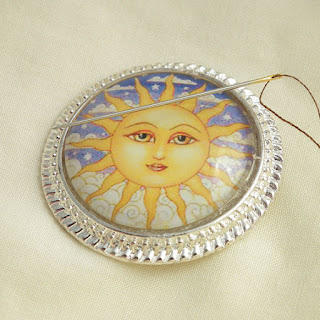 |
| Magnetic Needle Minder |
Supply Brands that I recommend:
Epson Ultra Presentation Paper Matte - this is a heavy paper, 51lb that gives a professional finish. It is not cheap, but one box lasts a very long time.
Cobra Graphics - This is a supplier of downloadable digital graphics specifically designed for people to use for photo glass cabochons. Her designs are stunningly beautiful. The colors are vibrant. Check out her huge selection in her Etsy shop.
Happy Frog Digitals - This is another supplier of digital graphics and is where I purchased the treble clef, bass clef digital downloads I used to demonstrate in this tutorial. I received a variety of sizes in the same download.
Happy Frog Digitals - This is another supplier of digital graphics and is where I purchased the treble clef, bass clef digital downloads I used to demonstrate in this tutorial. I received a variety of sizes in the same download.
Piddix Graphics - This is another excellent supplier of downloadable digital graphics. Take a look at her shop.
Lilly D's "Lily Glaze" available from her shop - this glaze/glue is the best I have tried for this project. I get the fewest bubbles when using it, and no silver glazing in the picture.
LillyD's Glass Cabochon available from her shop - these are the most consistently clear glass photo domes I have found.
Micro Glaze used to seal inket prints. This is also available at Lilly D's as well as other vendors.
Micro Glaze used to seal inket prints. This is also available at Lilly D's as well as other vendors.
Other excellent tutorials:
I am truly indebted to those who wrote these tutorials. They helped me advance in this craft. You may like to read these as well. It helped me to read what various people said to finally get it in my brain and more importantly into my hands as they worked.
Molly Smith's blog post on placing photos in the freezer
We haven't discussed how to take a photo you already have and use if for a badge reel, and we haven't talked about how to make a magnetic badge reel. I will do separate posts about those.
Please let us know your experience with making photo glass cabochons. Have your tried this? Do you have any tricks to make it easier? We would love to hear from you.



Where do you find those pendant trays?
ReplyDeleteWhere do you find those pendant trays?
ReplyDeleteMolly - I purchased these from an Etsy seller - DIY Jewelry Wholesale. Here is a link -
ReplyDeletehttps://www.etsy.com/listing/232334047/12mm-14mm-20mm-25mm-30mm-silver-setting?ga_search_query=silver+settings+blank&ref=shop_items_search_21
Have you ever had a problem with the glass not sealing to the inkjet photo printed on Matte paper?
ReplyDeleteValerie- I have not had a problem with the glass not sealing. I have had problems with the glass an photo partially sealing leaving air bubbles under the glass and distorting the image. I have found that if the paper I used is too thick, I have problems. Since I first wrote this post I have started using Core'dinations Premium CardStock Great White paper. It is available at Joann's. This works beautifully.
ReplyDeleteI hope this helps.